Box braids, cornrows, and knotless braids are consistently the best braid styles for growing hair longer, but not because they speed up your hair's growth rate. They work by protecting your ends, reducing daily manipulation, and keeping shed hairs contained so you retain more of the length your hair is already producing. The real secret to 'growing hair with braids' is retention, not acceleration.
Best Braids to Grow Hair: Retention, Low Tension Guide

Simone Okonkwo
27 Apr 2026
If you want the best protective style to grow hair, focus on retention with a low-tension braid and a consistent scalp and moisture routine growing hair with braids. And the difference between braids that help and braids that hurt comes down almost entirely to tension, size, and how well you care for your scalp while they're in.
Braids don't make your hair grow faster (here's what they actually do)
Your hair grows from follicles in your scalp, and that growth rate is driven by genetics, nutrition, hormones, and overall health. The average growth rate is about half an inch per month regardless of what style you're wearing. Braids don't change that number. What they can change is how much of that growth you actually keep.
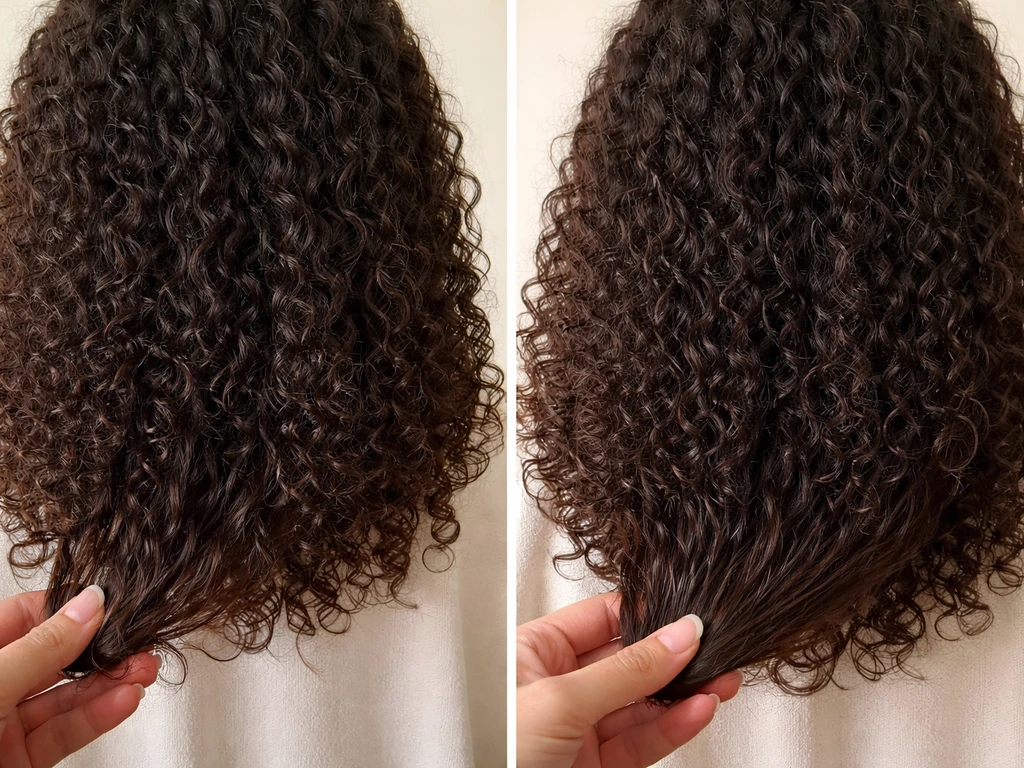
Textured and natural hair, especially type 4 coils, is more prone to mechanical breakage at the ends because the tight curl pattern creates stress points along each strand. Daily combing, manipulation, friction from clothing and pillowcases, and constant shrinkage can snap those ends off faster than your hair is growing. So even though your scalp is producing half an inch a month, if you're losing a quarter inch to breakage, your net gain is tiny. Braids reduce that manipulation dramatically, giving your hair a chance to accumulate length without constant wear and tear.
The flip side is real and important: braids can also cause hair loss through traction alopecia, which is hair loss driven by prolonged tension on the follicle. This is well-documented in dermatology research. Tight braids, especially at the hairline and edges, create sustained pulling forces that over time damage follicles and can progress from temporary shedding to permanent scarring alopecia if the warning signs are ignored. If braids are tied too tight, prolonged tension can damage follicles and progress to traction alopecia. So the style that's supposed to protect your hair can destroy it if done wrong. That tension issue is what every section of this guide comes back to.
The braid styles that actually support length retention
Not all braid styles carry the same risk-to-benefit ratio. Here's a practical breakdown of the most popular options and how they stack up for someone whose primary goal is retaining length.
Knotless box braids
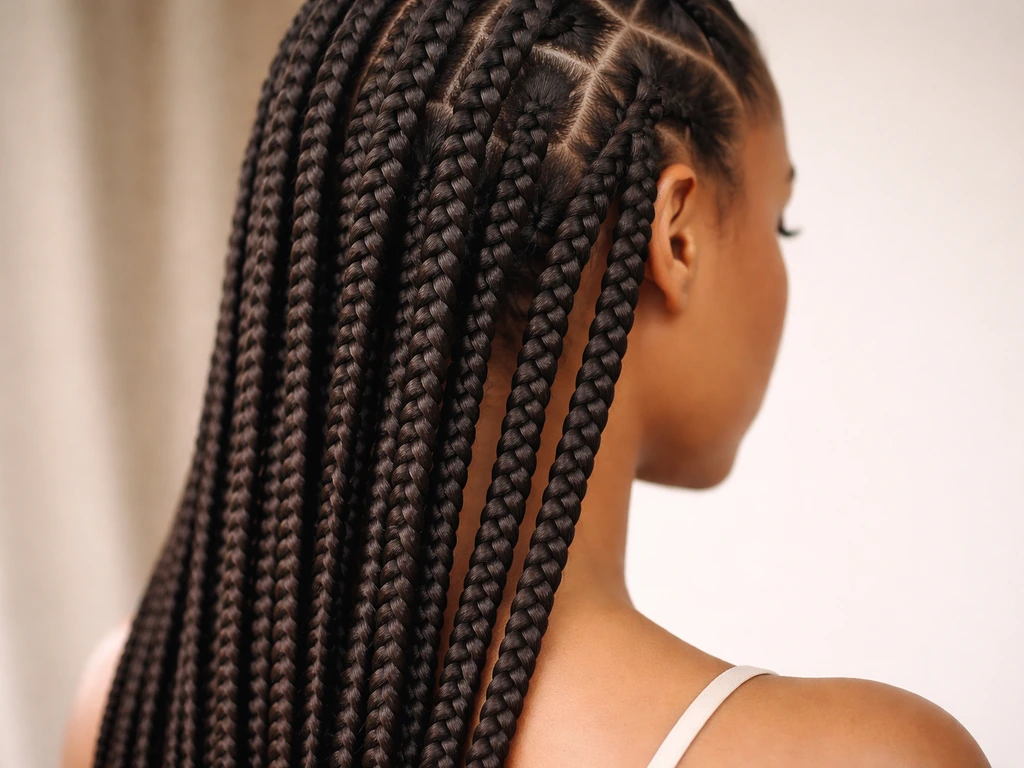
Knotless braids are currently the gold standard for protective styling aimed at length retention. Once your braiding style is set, you can follow the same low-tension retention rules to learn how to grow a Jedi braid without damaging your hairline knotless braids. Unlike traditional box braids, which start with a knot that sits directly on the root, knotless braids start with your natural hair and gradually feed in extension hair.
This eliminates the heavy, tight anchor at the root, significantly reducing tension at the scalp. Your natural hair carries the weight more evenly, and the style tends to feel much lighter. For people with fragile edges or a history of traction at the hairline, knotless braids are the first recommendation.
Traditional box braids (medium to large size)
Traditional box braids done at medium or large size are still a solid option when installed with appropriate tension. The bigger the braid, the less tension each individual section puts on your scalp, and the less time the installation takes (reducing sitting time). The main concern with traditional box braids is the knot at the base and the weight of extension hair, both of which can create traction if braids are made too small or too heavy. If you want traditional box braids, go medium to large, use lightweight extension hair, and be very clear with your stylist about tension at the roots.
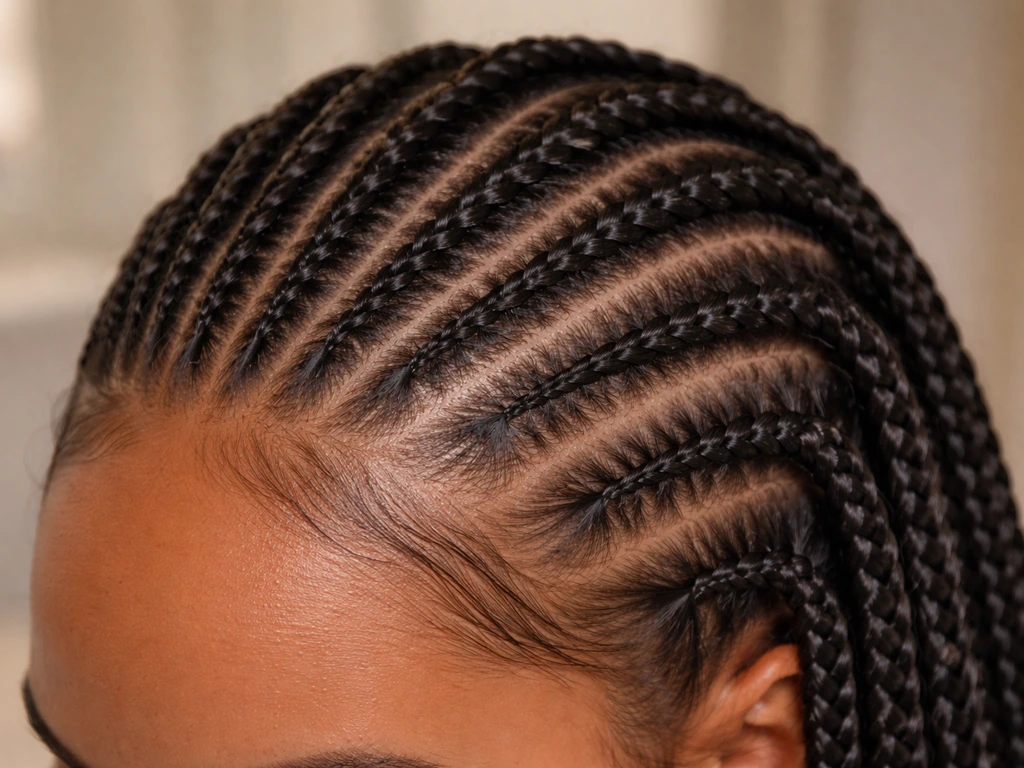
Loose cornrows
Cornrows can be excellent for retention when they're loose, but they're also among the highest-risk styles for traction alopecia when done tightly. If your goal is specifically how to grow hair in cornrows, start by keeping them loose and prioritizing low-tension installation and steady scalp care. Dermatology education materials specifically list tight cornrows in the highest traction-risk tier, while loose cornrows sit in a lower-risk tier. That distinction matters.
If you're getting cornrows for a protective style, the pattern should sit flat without pulling the skin around the parts into ridges, your scalp shouldn't feel sore after installation, and the edges should never be slicked back under tension. Cornrows used as a base for sew-in weaves add another layer of tension risk that's worth knowing about.
Twists (two-strand and flat twists)
Two-strand twists and flat twists are among the lowest-tension protective styles available. Because they don't grip or lock the hair in the same way braids do, they're gentler on the follicle while still reducing daily manipulation. The trade-off is that they unravel more easily and may not last as long as braids. For someone who's experienced traction issues in the past, starting with twists before transitioning to braids is a smart way to give the hairline time to recover.
Styles to approach with caution
Micro braids and jumbo braids at the extreme ends of the size spectrum both carry elevated risk. Micro braids create a lot of tension points across the scalp and take hours to install, meaning your scalp is under sustained tension for a long time. Jumbo braids can be too heavy and pull at roots. Braided ponytails and buns with tight edges are consistently problematic for hairline retention. And any style that requires extreme slicking back of the edges or uses heavy gel to lay the hairline flat under tension is working against your retention goals.
| Style | Tension Risk | Best For | Watch Out For |
|---|---|---|---|
| Knotless box braids | Low | Length retention, fragile edges | Weight of extensions if too long |
| Medium/large box braids | Low to moderate | Most hair types, long wear | Tight knots at root, heavy extensions |
| Loose cornrows | Low to moderate | Scalp access, moisture retention | Becoming tight as hair grows |
| Tight cornrows | High | Not recommended for growth goals | Traction alopecia, edge thinning |
| Two-strand twists | Very low | Sensitive scalp, recovery periods | Shorter wear time |
| Micro braids | High | Not recommended for retention | Prolonged installation tension |
| Braided ponytail/updo | Moderate to high | Occasional styling only | Chronic edge traction |
How to install braids (or tell your stylist exactly what you need)
Whether you're sitting in a salon chair or doing your own braids at home, installation details make or break your results. This is where most of the damage happens, and most of it is preventable.
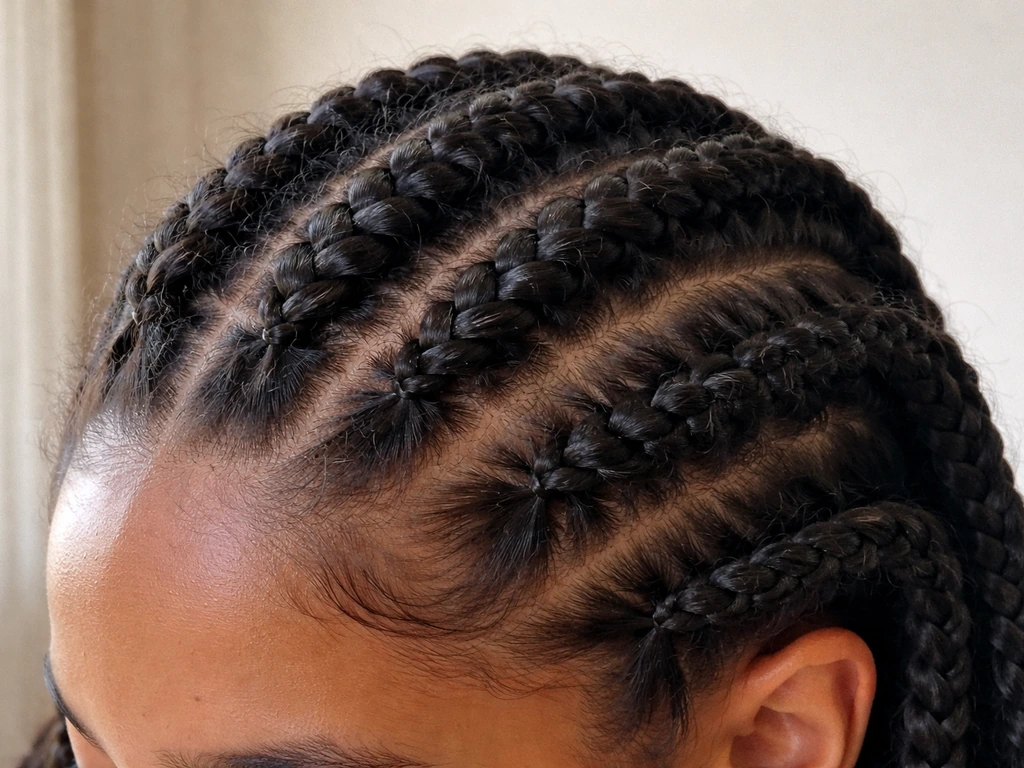
Size and parting
Larger sections mean less tension per section and less time in the chair. For a retention-focused install, medium-sized box braids (roughly a pencil-width parting or slightly larger) are a good balance between longevity and tension safety. The parting pattern matters too: clean, straight parts distribute tension evenly. Avoid very small, tightly packed parts that leave thin strips of scalp between sections, since those sections pull from a tiny base of hair.
Tension at the root
This is the most important variable. The braid should not feel tight at the root immediately after installation. If your scalp is sore, you're seeing bumps along the parts, or the skin near your hairline looks pulled, that's too much tension. A well-installed braid should feel secure but not painful. If you're in a salon and it's hurting, say something immediately. Stylist adjustments made during installation take seconds; correcting traction alopecia takes months or years, if it's possible at all.
Protecting edges and the hairline
The edges and nape are the most vulnerable areas because the hair there is naturally finer. Ask your stylist specifically not to braid the hairline too tightly and not to incorporate every single baby hair under tension. Leaving a small amount of natural hair out at the perimeter, or using a loose braid pattern along the hairline, reduces the cumulative tension those follicles experience. If you've had thinning at the hairline before, tell your stylist upfront.
Extension hair weight
Heavy extension hair adds to the downward tension on each root. For long-term wear, lighter-weight braiding hair reduces the load. Kanekalon fiber tends to be lighter than some other synthetic options. If you want very long braids, balance the look with a reasonable weight, or consider dipping the ends in hot water to seal them and trim slightly to reduce bulk at the tips.
Quick checklist for a tension-safe install
- Start on freshly washed, detangled, stretched hair (not soaking wet or bone dry)
- Parts should be clean but not paper-thin
- Braids should feel snug, not painful, immediately after installation
- No bumps or ridges along the scalp parts
- Hairline and nape should be braided loosely or left with a natural edge
- Extension hair should be a manageable weight for the braid size
- If something hurts during installation, say so right away
How long to keep braids in (and how to take them out without undoing your progress)
The general guidance from both hair care professionals and dermatology sources is to keep braids in for no longer than six to eight weeks. That window allows you to get the retention benefits of reduced manipulation without letting the style become a source of damage. After eight weeks, new growth at the root starts to create matting and tangles where your natural hair meets the extension, and removal becomes significantly harder. The longer that transition zone sits, the more breakage you'll cause when you finally take the style down.
If you want to go longer than eight weeks, you'd need to commit to careful maintenance, including moisturizing consistently, keeping the scalp clean, and being honest with yourself about whether the roots are becoming matted. Some people with slower growth patterns or very well-maintained braids can stretch to ten weeks, but that's the upper limit before the risk starts outweighing the benefit.
Taking braids down the right way
Removal is where a lot of people accidentally lose the length they worked so hard to retain. Rushing this step causes breakage. Give yourself several hours, put on something to watch, and work through it patiently.
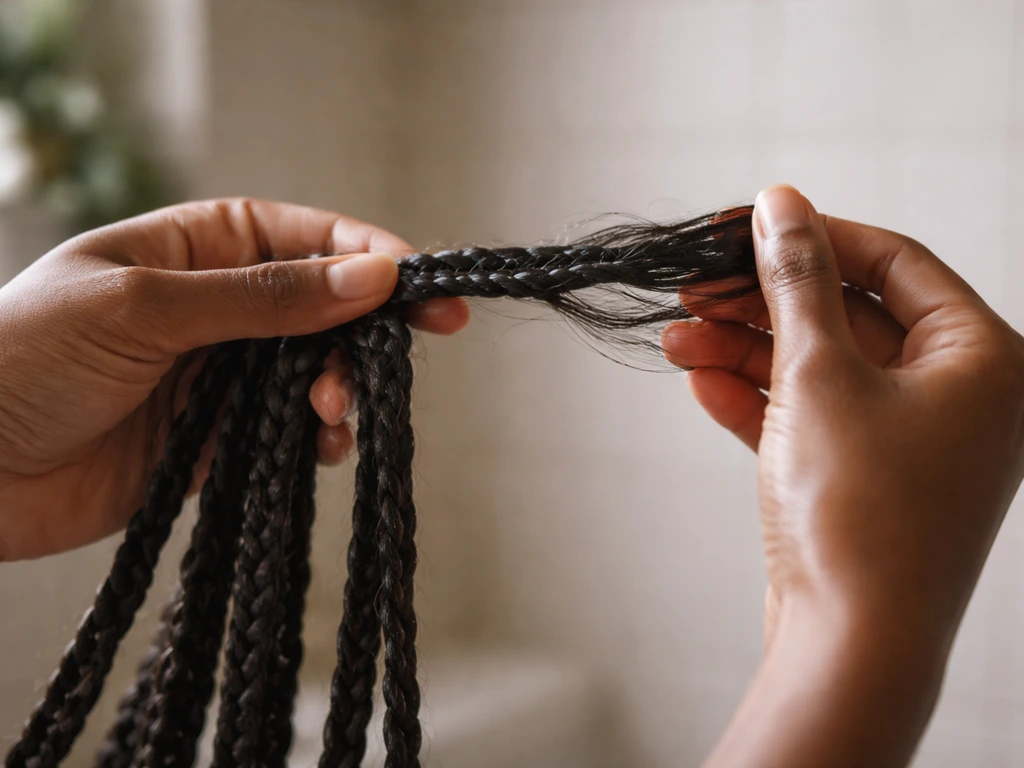
- Apply a generous amount of a slippery conditioner, oil, or detangling spray to each braid before you start cutting or unraveling. This starts softening the new growth at the root.
- If you're cutting extension hair to speed up removal, cut below the knot (for traditional box braids) or several inches down from the root, never right at the scalp.
- Unravel each braid slowly from tip to root, using your fingers rather than a comb wherever possible.
- As you unravel, gently separate the shed hair (which is normal and will look like a lot) from your natural hair using your fingers.
- Once all braids are out, apply a moisturizing deep conditioner or a protein-moisture balanced treatment to the entire head and let it sit for at least 20 to 30 minutes under a plastic cap.
- Rinse, then detangle with a wide-tooth comb starting at the ends and working up to the roots while hair is still saturated with conditioner.
- Follow with your regular wash and moisture routine before putting your hair in any new style.
The shed hair you see at removal is not breakage. Hair sheds naturally at a rate of about 50 to 100 strands per day, and when it's in braids, that shed hair stays trapped in the style instead of falling out normally. When you take the braids down after six to eight weeks, you're releasing weeks of accumulated shed, which looks alarming but is mostly normal. True breakage is shorter pieces that snap rather than full strands with a small white bulb at the root end.
Caring for your scalp and hair while braids are in
One of the biggest myths about braids is that you just put them in and leave them alone. To get the best results, combine protective styling with an active scalp and moisture routine, not a set-and-forget mindset protective style with an active routine. Healthy hair growth during a protective style still requires an active routine, especially for textured hair that loses moisture faster than straight hair types.
Cleansing your scalp
You should be cleansing your scalp every two to three weeks while in braids. A dirty, buildup-laden scalp is not a healthy environment for hair growth, and neglecting it for the entire wear period is a real mistake. Use a diluted shampoo or a scalp-focused cleansing spray applied directly to the parts. Work it in gently with your fingertips, then rinse thoroughly. Follow with a light conditioner or a conditioning spray on the length. Let your braids air dry fully, since a consistently damp scalp under braids can lead to mildew and scalp irritation.
Moisturizing and sealing
Textured hair needs moisture even when it's braided. Every two to three days, apply a water-based moisturizer or a light leave-in conditioner to your scalp and along the length of your braids, focusing on the roots where your natural hair is. Follow that with a light oil (jojoba, argan, or grapeseed work well) to seal in the moisture. Heavy products applied in large amounts will cause buildup and attract lint, so less is more here. A small amount of oil massaged into the scalp also supports circulation, which keeps the environment around the follicle healthy.
Protecting your braids at night

Always sleep with a satin or silk bonnet, scarf, or pillowcase. Cotton pillowcases absorb moisture from your hair and create friction that can frizz and weaken the braid pattern over time. A satin bonnet large enough to cover all your braids is the most effective option. If your braids are very long, loosely gather them before covering to keep them from tangling during sleep.
Edges need extra attention
Apply a light edge oil or a strengthening treatment to your hairline and nape at least every other day. Ingredients like castor oil, peppermint oil, and biotin-infused formulas are popular for edge care, though the evidence for dramatically accelerating growth is mixed. What they reliably do is keep the hair there moisturized and reduce the brittleness that leads to breakage. Avoid heavy edge-laying gels that contain high-hold polymers and alcohol, which can dry and coat the hairline.
When braids aren't working: troubleshooting common problems
Itching and scalp irritation
Some itching in the first few days after a fresh install is normal as your scalp adjusts. Persistent itching that doesn't ease up within a week usually points to one of two things: a reaction to the extension hair (some synthetic fiber is coated with alkaline compounds that irritate the scalp) or product buildup and lack of cleansing. For extension-related irritation, soaking your braiding hair in apple cider vinegar diluted with water before installation can help neutralize the alkaline coating. For buildup, cleanse the scalp with a gentle, diluted shampoo and make sure you're not over-applying heavy products.
Dryness and brittleness
If your hair feels dry and brittle when you take braids out, your in-braid moisture routine wasn't frequent or effective enough. Going forward, moisturize every two to three days without exception, and make sure you're using a water-based product first rather than starting with oil, which can sit on top of dry hair and block moisture from getting in. A pre-braid deep conditioning treatment before installation also sets your hair up with a better moisture foundation for the wear period.
Thinning edges or hairline
Thinning at the edges is the most important warning sign to take seriously. If you notice your edges are shorter, sparser, or have visible bald patches after removing a style, that's traction alopecia developing. Caught early, it's reversible: take a break from any tension style for at least two to three months, keep the hairline moisturized, and see a dermatologist if the thinning doesn't begin to fill in within a few months. Ignored over multiple style cycles, traction alopecia can progress to scarring, which is permanent. This is not a cosmetic issue to push through.
Breakage after removal
If you're seeing a lot of short broken pieces during or after removal (not the longer shed strands with white bulbs), something in the process caused mechanical breakage. The most common culprits are leaving braids in too long (matting and tangling at the root), removing too quickly without enough slip from conditioner or oil, using a fine-tooth comb on dry tangled hair, and low moisture during the wear period leading to brittle strands. Go back through the removal steps above and build in more time and more conditioner next time.
Hair isn't growing as expected
If you've been using protective styles consistently but not seeing the length you expected, braids alone are not the full picture. Hair growth is also shaped by nutrition (protein, iron, zinc, and vitamins like D and B12 matter), hydration, sleep, stress levels, and scalp health. Relaxed or chemically processed hair also experiences different breakage patterns than natural hair and may need more protein treatments to maintain integrity during protective styles. If you've addressed tension, moisture, and wear time and still aren't retaining length, it's worth looking at your overall health and whether your hair needs a different protein-moisture balance.
A note on natural vs relaxed hair in braids
Braids work as a protective style for both natural and relaxed hair, but relaxed hair requires some extra consideration. Chemical relaxers weaken the hair's protein structure, making it more susceptible to breakage, especially at the point of demarcation where new growth meets relaxed hair. That transition zone is fragile, and braids installed over relaxed hair need to be especially tension-free at the root to avoid snapping that vulnerable section. Protein treatments before installation are particularly important for relaxed hair, and the wear period should stay on the shorter end of the six-to-eight-week range.
Putting it all together: your practical starting point
If you're starting today, here's the honest, practical sequence. Choose knotless box braids or medium-sized traditional box braids as your style. Wash, deep condition, and detangle your hair before your appointment. Communicate with your stylist about tension before they start, not after it hurts.
Keep your braids in for six to eight weeks maximum. Cleanse your scalp every two to three weeks and moisturize your hair every two to three days while the style is in. Sleep in a satin bonnet every night. Take the braids down carefully with conditioner and detangle gently.
Give your hair a few days of open styling before reinstalling. Repeat that cycle and you will retain more length than any product or growth serum can promise you.
For deeper dives into specific parts of this process, growing your hair out specifically for braiding installations, using cornrows as a base for length retention, and choosing the right protective style for your specific hair goals are all topics worth exploring on their own. For box braids specifically, focus on low-tension installation and a consistent in-braid scalp and moisture routine to maximize retention how to grow out your hair with box braids.
The principles are consistent: low tension, consistent moisture, strategic wear time, and patient removal are the only things standing between your scalp's natural growth rate and the length you're trying to reach. If you want more specific guidance on technique and timing, check out our step-by-step on how to grow braids for guys.
If you want to maximize results, focus on low tension, consistent moisture, and the right wear time so your hair can keep retaining the length it grows while braided grow your hair for braids.
FAQ
Are the best braids to grow hair, or can twists and other protective styles work too?
Yes. You can still retain length if you do twists or other low-tension styles, but the plan changes from “braid-specific” to “tension plus handling” rules. For twists, prioritize larger sections and gentle sectioning (to avoid pulling at the root), cleanse the scalp on the same 2 to 3 week schedule, and refresh moisture every 2 to 3 days so the style does not dry out and snap at the ends.
How do I know my braids are too tight for hair growth retention?
If your scalp is sore, don’t wait until the next appointment. Tell your stylist immediately or remove it if you braided yourself. Persistent tightness that lasts beyond the first week often means the braid pattern, part size, or root integration is too aggressive, and loosening during installation takes minutes, while traction damage can take months to recover.
Can I wash my scalp while my braids are in, and will it mess up the style?
You can cleanse without fully removing braids. Use a diluted shampoo or scalp cleanser focused on the part lines, massage with fingertips only, and rinse thoroughly so product residue does not create buildup at the roots. Avoid soaking the braids in a way that keeps the scalp damp, and fully air dry (or use gentle heat if you have it) to prevent mildew and scalp irritation.
How can I tell when it’s time to take braids out before 6 to 8 weeks?
Braid length retention often fails when the re-growth zone mats. If you see tangling at the root, increased shedding that feels like knots, or the braids start to look “fuzzy” near your hairline, it is time to remove and reset. Also watch the parts, if the parts look lifted or pulled into ridges, the tension is changing and you should adjust or shorten the wear time.
What if my scalp gets oily, can I cleanse more frequently than every 3 weeks?
Washing more often is usually better than less, but be strategic: cleansing every 2 to 3 weeks is the baseline, and if you’re an athlete or your scalp gets oily quickly, you can do it closer to every 1 to 2 weeks. The key is thorough rinsing and full drying, so you do not create trapped moisture under braids.
During braid removal, how do I tell shed hair from actual breakage?
No. Shed strands in braids are usually trapped, not “new growth breaking.” True breakage looks like short snapped pieces, often smaller than a normal shed strand, especially during detangling. If you get a lot of very short pieces with no long shed hair, check the removal process (more slip, more time), wear length, and whether moisture was enough.
Does using lighter braid hair actually help, and what should I ask my stylist for?
Choose lighter extension hair and avoid extreme shrinkage. You can also reduce bulk by trimming only the ends after installation (not cutting into the root), sealing the ends if you use heat methods, and asking your stylist to keep the braid weight reasonable for your scalp. Heavier hair increases downward traction on the roots, which can show up as soreness or edge thinning over time.
Can I wear braided ponytails or buns and still retain length?
Yes, and it depends on your goal. If you are targeting hairline retention and you have fragile edges, prioritizing knotless or low-tension twists usually makes more sense than slicked-down braided ponytails. If you do wear a braided updo, keep the edges out of tight tension zones, use minimal pulling at the perimeter, and remove it as soon as it starts to create a “pulled” look or soreness.
What should I do if I get itching or flaking after getting braids installed?
Some flaking is normal, but visible buildup that continues to worsen, itching that lasts beyond the first week, or red, irritated patches is a red flag. In those cases, stop heavy products, cleanse the scalp gently, and consider switching to lighter, water-based moisturizers. If irritation persists after a few cleanses, talk to a dermatologist or consider an allergy to the extension fiber or adhesive products.
What if my edges start thinning after I remove the braids, is it normal?
If your edges thin during one style cycle, treat it as a traction warning, not “just shedding.” Take a tension break (often 2 to 3 months), keep the hairline moisturized, and avoid slick edge-laying under tension for the next attempt. If the thinning does not start to refill within a few months, or you develop patchy bald areas, see a dermatologist to assess traction alopecia early.
Why do I retain length in some sections but not others when I wear braids?
To avoid uneven retention, keep the moisture routine consistent at both the scalp and the braids. A common mistake is oil-first (oil sitting on top of dry hair), or skipping the roots while focusing only on the lengths. Use a water-based product first on the scalp and roots, then seal lightly, and re-moisturize every 2 to 3 days.
How do protective braids need to be adjusted for relaxed or chemically processed hair?
Relaxed hair can retain well in braids, but the transition zone is the vulnerability point. Ask for extra tension-free installation at the root, keep the wear window closer to the shorter end of 6 to 8 weeks, and make sure you’re maintaining a protein and moisture balance before install. If your hair feels gummy or overly stiff, that’s a sign the balance is off, and you may need to adjust treatments before your next cycle.
Next Article
How to Grow Black Women’s Hair: Length and Growth Guide
Step-by-step guide to grow and retain Black women’s hair, boost length via breakage control, and avoid traction damage.