Crochet braids can absolutely help you retain length and reach your hair goals, but they do not make your hair grow faster. Your follicles grow hair at a rate set by your biology, roughly 0.8 cm per month for many Black and African-textured hair types according to published phototrichogram research. What crochet braids do brilliantly is protect the hair you already have from daily breakage, manipulation, and environmental stress, so more of that monthly growth actually stays on your head. That distinction, growth versus retention, is the most important thing to understand before you install a single loop.
How to Grow Hair with Crochet Braids: Protect & Promote Length

Simone Okonkwo
13 Jul 2026
Growth vs. length retention: why the difference matters
I see this confusion constantly, and it leads people to either dismiss protective styles entirely or expect miraculous results from them. Hair growth is a biological process happening inside your scalp, driven by follicle cycling, hormones, nutrition, and genetics. Length retention is about how much of that grown hair you keep, rather than losing it to breakage, friction, and daily manipulation. A protective style like crochet braids operates entirely in the retention column.
Think of it this way: if your hair grows half an inch every month but breaks off half an inch at the ends, your length never changes. A low-tension crochet install tucks your ends away, dramatically reduces the friction and combing that cause mid-shaft breaks, and cuts down the daily handling that wears hair down. Over six to eight weeks, even at the same biological growth rate, you end up visibly longer because you stopped the breakage cycle. That is the real mechanism, and it is genuinely powerful for people with high-porosity, chemically processed, or naturally fragile textured strands.
A quick biology primer on how hair actually grows
Every strand on your head is produced by a follicle cycling through three phases: anagen (active growth), catagen (regression), and telogen (resting and shedding). The length of your anagen phase is the primary biological cap on how long your hair can grow, and it is largely genetic. During anagen, which lasts anywhere from two to seven years, the follicle actively produces new cells that push the shaft up and out. Catagen lasts a couple of weeks, and telogen lasts roughly three months before the follicle resets.
Loussouarn's 2001 study, one of the more cited phototrichogram studies on diverse populations, measured a mean growth rate of around 256 micrometers per day in African volunteers, compared to roughly 396 micrometers per day in a matched Caucasian group. That translates to approximately 0.8 cm versus 1.2 cm per month. This is not a deficiency, it is a documented biological difference that also correlates with a tightly coiled fiber structure that is more prone to breakage at curves in the shaft. The real practical takeaway is that for many Black and textured-hair readers, every centimeter grown is harder to keep because the structure itself is more mechanically vulnerable. Retention strategies matter more, not less.
What actually supports healthy hair growth
Before getting into crochet specifics, it helps to know what the evidence actually supports for follicle health and growth optimization. Protective styles are only one piece, and honestly not even the biggest piece.
- Nutrition: iron, zinc, biotin, vitamins D and B12, and adequate protein are the most consistently documented nutritional factors in hair loss literature. Deficiencies, especially iron and vitamin D, are common in women of color and can directly slow growth or trigger shedding.
- Scalp circulation: a 2016 study (small sample, n=9) found that four minutes of daily scalp massage for 24 weeks measurably increased mean hair strand thickness. The mechanism is likely improved blood flow and mechanical stimulation of dermal papilla cells. The evidence is preliminary but biologically plausible.
- Low-tension styling: sustained mechanical tension on follicles causes traction alopecia, which in early stages is reversible but can become permanent scarring loss with repeated injury. Reducing tension is protective in a very literal clinical sense.
- Gentle cleansing and scalp health: a clean, non-inflamed scalp supports optimal follicle function. Buildup and chronic inflammation compromise the follicular environment.
- Moisture and protein balance: for textured hair specifically, maintaining elasticity through regular moisturizing and targeted protein treatments reduces breakage at the shaft, directly supporting length retention.
- Minimizing heat and chemical overlap: heat weakens the protein structure of the shaft; chemical relaxers reduce tensile strength further. Combining both with tight styles substantially raises breakage and traction risk.
What does not move the needle: most commercial hair growth serums with no clinical evidence, scalp oils that sit on the surface without addressing underlying deficiencies, and the idea that any particular style inherently accelerates follicle activity. Styles manage retention. Biology manages growth.
Who crochet braids work well for, and who should pause
Crochet braids are genuinely versatile and work for a wide range of hair types and textures, natural and relaxed. They tend to be lower tension than traditional hand-braided extensions because the extensions are looped onto a pre-laid cornrow base rather than incorporated strand by strand with pulling. That said, they are not universally appropriate.
Good candidates for crochet braids
- Natural hair types 3a through 4c that are healthy and strong enough to hold a cornrow base without snapping
- Relaxed hair that is not significantly over-processed or excessively weak at the root
- People in the growth and retention phase who want to minimize daily manipulation for 6 to 8 weeks
- Those transitioning between relaxed and natural who want to protect both textures during the overlap period
- People with healthy hairlines and no current signs of traction stress
When to hold off or consult a professional first
- Active traction alopecia: visible thinning, tenderness, or scarring at the hairline requires medical assessment before any extension style is installed
- Significant scalp conditions like severe seborrheic dermatitis, psoriasis, or folliculitis that need treatment first
- Hair that is severely heat or chemically damaged to the point of high breakage at or near the scalp
- Recent chemical service (relaxer, color, or keratin) within the past two weeks, as shafts need time to stabilize
- Children with delicate, finer hair, where careful stylist assessment and lighter extensions are essential
If you have any active hairline recession or signs of traction damage, check out the guidance on how to grow your hairline back after braids before installing anything new. Getting that situation stabilized first is the smarter long-term move.
Pre-install preparation checklist
The work you do before the hair goes in is genuinely the most impactful part of the whole process. I cannot stress this enough: a properly prepped scalp and strand situation means less breakage during wear, easier removal, and better-looking natural hair underneath when you take the style down.
- Clarify: Use a clarifying or chelating shampoo to remove product buildup, hard water minerals, and sebum. Start completely clean. Buildup left under a crochet install will accumulate further and can contribute to scalp inflammation over the weeks of wear.
- Assess your hair's current health: Part through the hair in multiple sections and look honestly at breakage, split ends, and elasticity. Wet a strand and gently stretch it; healthy hair stretches slightly then returns. Hair that snaps immediately is moisture-depleted. Hair that stretches and does not return is over-moisturized and protein-deficient.
- Protein treatment if needed: If you are seeing high breakage or poor elasticity, apply a strengthening protein or bond-building treatment before the install. Follow with a deep conditioner, because protein alone without moisture leaves hair brittle.
- Deep condition: Regardless of breakage level, deep condition for 20 to 30 minutes under heat. Textured hair benefits enormously from moisture loading before being tucked away for several weeks.
- Detangle thoroughly: Use a wide-tooth comb or fingers on conditioner-slipped hair. Installing over tangles creates instant breakage points, especially during the cornrow base construction.
- Trim split ends: A small trim of half an inch to one inch removes the most fragile portions of the shaft. Split ends travel up the strand and cause more breakage over time, so removing them before install reduces losses during wear.
- Targeted scalp treatment: If you have any scalp inflammation, dryness, or flaking, address it now. A light salicylic acid scalp treatment or prescribed medicated shampoo should be used before, not during, the install when access is limited.
- Allow hair to dry fully: Install on fully dry hair. Braiding damp or wet hair creates tension as the hair shrinks during drying, which increases mechanical stress on follicles.
Choosing your materials
The materials you pick have a direct relationship to how much tension and weight your scalp carries for six-plus weeks. This is not a place to cut corners or grab whatever is cheapest.
Extension hair fiber
Most crochet extensions use synthetic fiber, most commonly Kanekalon or Toyokalon brands, or newer heat-resistant fibers marketed as 'future fiber.' Each has different heat tolerance ratings, so if you plan to do any heat styling on the extensions, check the manufacturer's specific maximum temperature before you do. Kanekalon is generally lighter weight, which is a meaningful advantage for tension management. For crochet specifically, matching the extension texture to your own natural texture reduces the amount of blending manipulation needed, which is a friction and breakage source at the roots.
Hook size and type
A standard latch-hook or crochet needle works for most installations. Smaller hooks allow for tighter, more precise loops but require more passes through the cornrow, slightly increasing friction. Larger hooks speed up installation. Pre-looped extensions eliminate the hook step entirely at each attachment point, which is faster but gives you less control over loop tension.
Base braid style
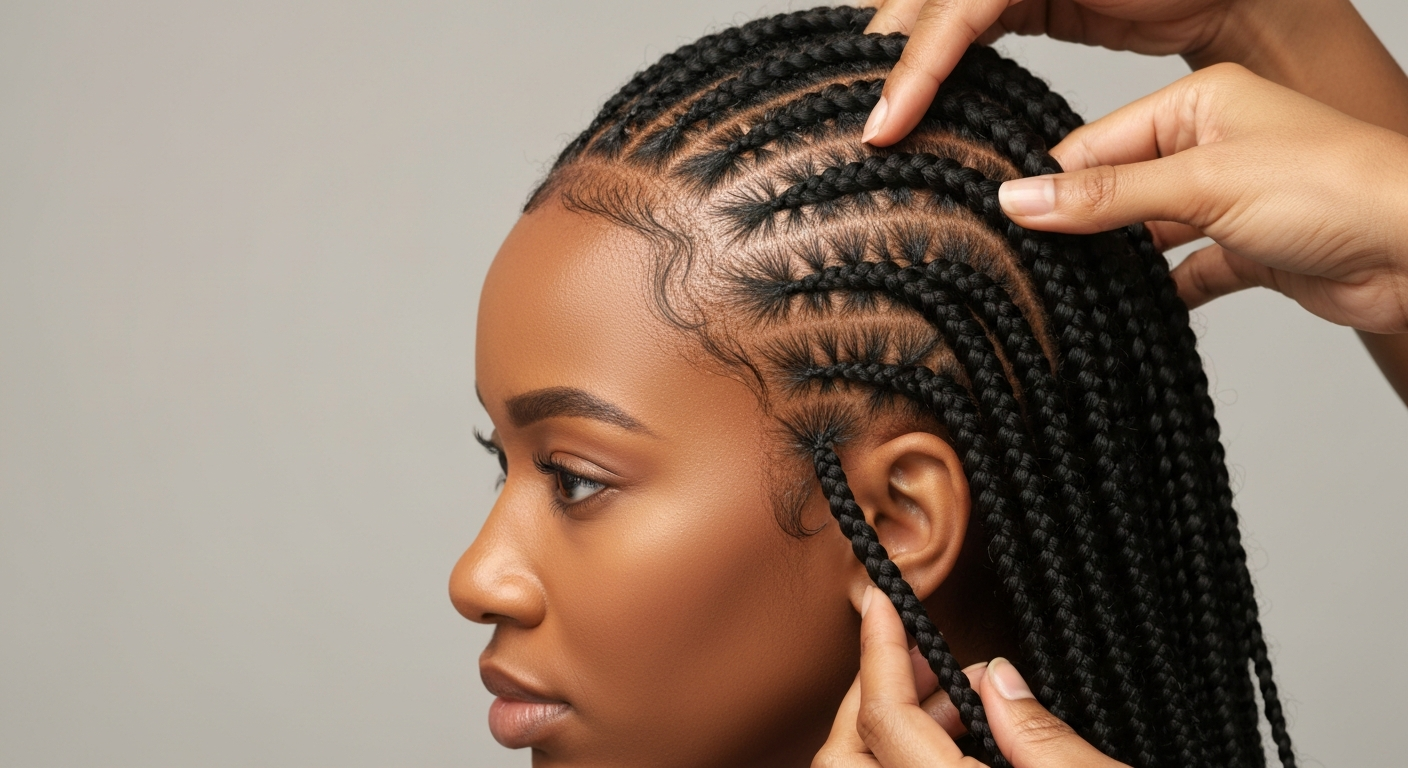
The cornrow base is the structural foundation and the main tension variable you control. Straight-back or curved cornrow patterns both work. The critical factors are braid tension (moderate, not tight), section size (larger sections at the perimeter and hairline to reduce follicle load), and the decision about whether to braid in your edges. Leaving a 1 to 2 cm perimeter of hair out of the base braids and not anchoring extensions directly at the hairline is one of the most consistently recommended practices in both professional training curricula and clinical guidance on traction prevention.
Elastics and other supplies
- Use fabric-covered or silicone-lined elastics only at braid ends, never at the root or hairline
- Avoid metal-tipped pins or clips near the hairline during or after install
- Have a wide-tooth comb, light oil, and leave-in conditioner on hand for the maintenance weeks
- Keep a light water-based moisturizing spray for scalp access between braids
Installation: step-by-step for low tension and hairline safety
Whether you are doing this yourself or sitting in a stylist's chair, understanding the process helps you advocate for your own hair. These steps reflect best practices from professional cosmetology training and dermatology-informed guidance on traction prevention.
- Section the hair: Divide clean, fully dry, detangled hair into sections using a rat-tail comb. Work from the nape upward. Keep sections even and appropriately sized for the look you want, but not so small that each braid is under constant strain.
- Lay the cornrow base with moderate tension: Braid each section into a flat cornrow using consistent, moderate tension. The braid should feel secure but not pull the skin away from the scalp. If you see or feel redness or tenting skin at the roots during installation, the tension is too high.
- Leave the perimeter out: The front hairline, temples, and nape edges are the most vulnerable to traction injury. Leave at least 1 to 2 cm of hair along the entire perimeter out of the cornrow base. These edges can be smoothed down flat and pinned gently later for styling, but they should not be braided tightly into the base.
- Secure braid ends lightly: Tuck braid ends under or secure with a single small fabric elastic. Avoid multiple elastics stacked at a single point.
- Begin looping extensions at the nape: Start attaching crochet hair at the nape and work upward. This mirrors the direction of natural hair growth and makes the process more manageable.
- Hook and loop with controlled tension: Insert the latch-hook under a cornrow, place the folded midpoint of the extension over the hook, pull through, and pass the ends through the loop. The knot should sit snugly on the cornrow but not cinch so tightly that it pulls the underlying braid upward.
- Check weight distribution: Do not overload any one cornrow section with too many extensions. Spread the hair evenly. Heavy extensions concentrated in one area create a localized tension point that adds up over weeks of wear.
- Avoid heavy anchoring at the hairline: If you are adding any hair near the front, use significantly less extension hair and opt for a lighter, more delicate attachment. Many stylists and dermatology resources advise skipping extension attachment at the front perimeter entirely and instead blending the left-out natural hair over the front row for coverage.
- Final check before finishing: Run your fingers along all rows and gently tug each attachment point. Nothing should feel sharp, painful, or cause visible lifting of the scalp skin. Any point that does needs to be loosened or removed and re-done.
- Style and seal the ends if needed: For synthetic fiber extensions that benefit from sealing, dip ends briefly in hot (not boiling) water if the fiber type supports it. Confirm heat tolerance for your specific fiber before doing this.
Keeping the style healthy while it's in
An install is only as good as its maintenance. This is where most people either maximize their retention or undo all the careful prep work.
Scalp care
Your scalp needs regular cleansing even under crochet braids. Every one to two weeks, dilute a gentle sulfate-free or low-poo shampoo in a squeeze applicator bottle and apply directly along each cornrow part, working it in with your fingertips (not nails). Rinse thoroughly and follow with a light conditioner on the lengths. Dry the scalp fully before re-wrapping at night, because a consistently damp scalp under synthetic fiber is an environment for fungal growth and folliculitis.
Moisturizing the natural hair underneath
This is the part people skip and then wonder why their hair is dry and breaking at takedown. Use a light water-based leave-in or moisturizing spray along each part two to three times per week. Follow with a very small amount of a sealing oil if your hair is low porosity. The goal is maintaining moisture in the natural hair, not coating the synthetic fiber with product. Keep product applications light to prevent the buildup that clogs follicles and attracts lint.
Nighttime protection
Sleep with a satin or silk bonnet or on a satin pillowcase every night. This reduces friction on both the extensions and the hairline edges. The edges especially need this protection because they are not enclosed in the crochet style and are exposed to friction all night if you skip it.
Troubleshooting common issues
| Problem | Likely Cause | What to Do |
|---|---|---|
| Itchy scalp with visible flaking | Buildup of product and sebum, possible seborrheic dermatitis flare | Cleanse more frequently with diluted shampoo; add a salicylic acid or zinc pyrithione scalp spray along the parts |
| Excessive shedding at takedown | Normal telogen shedding accumulated over weeks (100 strands/day is normal), or tension-related increase | Detangle very gently with conditioner; if hair is coming from the root with a white bulb attached, monitor for traction signs |
| Tender or painful scalp at the roots | Tension is too high in that section; traction stress actively occurring | Loosen affected loops immediately or remove that section; do not wait it out |
| Redness or small bumps at the hairline | Traction folliculitis: early warning sign of traction injury | Remove tight attachments near the hairline; cleanse gently; consult a dermatologist if pustules develop or do not clear within a week |
| Extreme dryness and brittleness at takedown | Insufficient moisturizing during wear or product buildup blocking moisture absorption | Deep condition immediately at removal; clarify first if buildup is significant, then do a deep conditioning treatment |
| Lint and debris embedded in extensions | Over-application of heavy products attracting particles | Use lighter, water-based products only; avoid butters and heavy creams directly on extensions |
How long to keep crochet braids in
The sweet spot for crochet braids from a hair health perspective is six to eight weeks. That window gives you meaningful length retention benefit without the compounding risks that come with extended wear: buildup, increased shedding from the locked-in telogen hairs, matting of the natural hair, and gradual tension creep as extensions get heavier with product and manipulation. I personally set a calendar reminder at week six to start the takedown process, no matter how much I am loving the style.
Wearing crochet braids past ten to twelve weeks significantly raises the risk of matting that requires aggressive detangling and mechanical breakage at removal. The relative protective benefit also decreases past eight weeks because the ends tucked inside begin to dry out and tangle with the extension fiber. If you want to continue protective styling, take the style down, give your scalp and strands at least a week or two of recovery, and reinstall fresh. This break-and-reinstall cycle is more effective for long-term retention than one continuous extended wear.
For more on timing protective styles for growth, the guidance on how long to keep braids in for hair to grow goes deeper into how wear duration affects your outcomes across different braid styles.
Measuring your growth while in the style
You cannot accurately measure your natural hair length while it is in a crochet install, but you can set yourself up for a clean comparison. Before the install, gently stretch a section of natural hair in the same location (typically the crown or nape) and mark the length with a hair tie or measure it in centimeters. Photograph it. When you take the style down, repeat the measurement in the same spot after washing and detangling. The difference is your retained growth. For tips on tracking and confirming actual hair growth under protective styles, see the guide on how to know if your hair grow in braids. At an average rate of 0.8 cm per month, a six-week install should theoretically yield around 1.2 cm of growth. If your retained length is close to that, the style is doing its job.
Taking the style down safely
Takedown is when most of the breakage actually happens, and it is entirely preventable with patience and the right approach. I have seen people undo six weeks of careful retention in thirty minutes of rough removal.
- Start with a detangling or slip product: Apply a generous amount of a conditioner, detangling spray, or lightweight oil to each extension before you begin removing it. This lubricates the attachment point and reduces friction as you work the loop loose.
- Cut extension hair first: Trim the crochet extension hair down to a few inches from the knot before attempting to unloop it. Working with shorter extensions gives you way more control and reduces the pull on the natural hair underneath.
- Unloop, do not yank: Slide each loop off the cornrow carefully. If it is stuck, add more slip product and gently work it loose. Pulling hard risks snapping the natural hair right at the root.
- Unravel the cornrow base section by section: Work in small sections. As you unravel each braid, immediately add conditioner or detangling product to that section of natural hair before moving to the next.
- Detangle under running water or with a wide-tooth comb: Do not attempt to detangle dry. Add conditioner, work from ends to roots in small sections, and be patient. The shed hair that accumulated over weeks will come out now; expect more than usual and do not panic.
- Clarify then deep condition: Once detangled, shampoo with a clarifying wash to remove six to eight weeks of buildup from the scalp and strands. Follow immediately with a deep conditioning treatment for at least 20 to 30 minutes.
Post-style recovery and hairline care
After takedown, give your hair and scalp a genuine recovery period before your next install. This does not have to be long, one to two weeks of light styling, moisturizing, and scalp massage is usually sufficient for a healthy install with no tension issues. During this window, gentle daily scalp massage for a few minutes improves circulation to follicles that have been under static tension for weeks, which research suggests may support follicle health and thickness over time.
If you notice hairline thinning or recession after removal, take it seriously. Early-stage traction alopecia, characterized by reduced density at the temples or front hairline, is reversible if you stop the tension immediately. The clinical priorities at this stage are removing the causative style (done), gentle scalp care, treating any inflammation, and considering topical minoxidil for persistent thinning under dermatologist guidance. Chronic repeated traction can eventually cause scarring that is no longer reversible, which is why catching and addressing early signs matters enormously. The article on how to grow your hairline back after braids covers this recovery process in more detail.
How crochet braids compare to other protective styles
Crochet braids sit in an interesting position among protective styles. They offer more speed and less initial root tension than traditional hand-braided extensions like box braids, but require a cornrow base that itself must be installed carefully. Here is how they stack up against related styles for retention and tension risk.
| Style | Tension Risk | Length Retention Potential | Ideal Wear Time | Best For |
|---|---|---|---|---|
| Crochet braids | Moderate (depends heavily on base tension and extension weight) | High when installed correctly | 6 to 8 weeks | Volume, variety, faster installs with versatile textures |
| Box braids | Moderate to high (depends on size and tension) | High | 4 to 8 weeks | Classic looks, long-term wear with careful tension management |
| Knotless braids | Lower than box braids (feed-in method distributes tension) | High | 6 to 8 weeks | Sensitive hairlines, high-tension concerns, natural-looking installs |
| Bantu knots | Low to moderate (no extensions, depends on manipulation) | Moderate | Up to 1 to 2 weeks | Short-term style, curl definition, low-manipulation rest periods |
| Traditional cornrows (no extensions) | Low to moderate | Moderate | 2 to 4 weeks | Scalp rest, base for crochet installs, simple protective wear |
Knotless braids deserve a specific mention because the feed-in technique that defines them distributes weight and tension more evenly along the braid length rather than concentrating it at a single root knot. For people with tension-sensitive hairlines or a history of traction issues, knotless braids may be a better starting point. The comparison between how hair grows in knotless braids versus crochet installs is worth exploring if you are weighing the two.
Box braids and crochet braids are often compared because they deliver a similar aesthetic. The key mechanical difference is that box braids incorporate the extension hair directly into the braid from root to tip, while crochet attaches to a pre-existing base. Neither is inherently safer than the other; the installation tension and maintenance practices determine the outcome in both cases. For specifics on typical growth while wearing a similar extension style, see how much does your hair grow in box braids.
When to see a professional
There are situations where a DIY approach or even a well-meaning salon visit is not the right call. If you are seeing any of the following, consult a board-certified dermatologist or trichologist, not just a stylist, before your next install:
- Visible hairline recession that has not recovered between installs over multiple style cycles
- Persistent tenderness, follicular bumps, or pustules along the hairline or scalp
- Patches of reduced density that do not match your typical shedding pattern
- Hair that continues to break significantly at the root even with careful styling
- Scalp conditions like folliculitis, psoriasis, or seborrheic dermatitis that are not controlled with over-the-counter products
A dermatologist can distinguish between traction alopecia, androgenetic alopecia, alopecia areata, and other conditions that require completely different interventions. Getting that diagnosis early makes a meaningful difference to outcomes. Styling decisions, however carefully made, cannot substitute for medical assessment when actual follicle damage or pathology is in play.
The realistic picture
Crochet braids, done right, are genuinely one of the better tools in a retention-focused hair care toolkit. They reduce daily manipulation, protect ends, give follicles a break from constant styling tension, and allow you to grow out length that would otherwise be lost to breakage. They do not speed up the biological clock inside your follicles, and no style does. For a focused look at whether bantu knots can stimulate growth, see the article 'Do bantu knots make hair grow'. Afro‑textured hair care: a narrative review and recommendations for dermatologists - PMC reports that protective styles primarily preserve existing hair length rather than increasing the intrinsic follicular growth rate blank" rel="noopener noreferrer">Afro‑textured hair care: a narrative review and recommendations for dermatologists - PMC reports that protective styles primarily preserve existing hair length rather than increasing the intrinsic follicular growth rate.. The goal is to match your retention to your growth rate as closely as possible, and consistently installed, well-maintained, timely-removed crochet braids do exactly that. Pair the style with solid nutrition, regular scalp care, and low-tension practices across all your styling, and the length gains are real and measurable. For a step-by-step plan on promoting natural growth while using braided protective styles, see the guide on how to grow your natural hair with braids.
FAQ
Can crochet braids make my hair grow, or do they only help retain length?
Crochet braids do not change your hair’s biological growth rate (which is set by follicle cycling) but they can help retain length by reducing daily manipulation and breakage when installed and maintained correctly. In other words, they protect existing hair so you keep more length over time; they don’t speed up the anagen phase of follicles on their own.
What is the basic science of hair growth I should know before using crochet braids?
Scalp hair cycles through anagen (growth), catagen (transition) and telogen (rest). Intrinsic factors—genetics, follicle health, hormones—determine instant growth rate and anagen duration. External practices (nutrition, scalp health, reducing breakage) influence how much length you retain, not the cellular growth ceiling. Mechanical factors (tension, inflammation) can shorten anagen or cause follicle damage and hair loss.
What are the main goals for using crochet braids as a protective style?
1) Minimize tension at the follicle to avoid traction injury; 2) reduce manipulation and friction to limit breakage; 3) maintain a clean, well‑moisturized scalp and healthy follicles; 4) avoid product buildup that suffocates follicles; 5) plan safe wear and recovery timelines to preserve hairline and density.
What should I do in pre-install preparation (step‑by‑step)?
1) Wash and clarify the scalp to remove buildup; 2) deep‑condition and use detangling to remove knots; 3) trim split ends and repair severely damaged hair (protein/bond‑builder where indicated); 4) moisturize and seal the hair; 5) blow or air‑dry completely (dry base reduces mildew/buildup); 6) plan cornrow pattern with larger perimeter sections and leave a small edge allowance or leave-out where desired.
Which materials and extension choices reduce risk of damage?
Choose lighter-weight bundles and fewer total grams; match texture and ply to natural hair to avoid extra manipulation; prefer heat-resistant or high-quality synthetic fibers if you plan light styling heat, and check manufacturer heat ratings; use pre-looped hair only if loops are not overly small or tight; pick softer, looser hair textures (boho/water wave, loose curls) instead of heavyweight straight bundles for long installs.
How should the braid base be constructed to minimize tension?
Cornrows should be medium-loose tension, with larger sections at the hairline (1–2 cm margin) and fewer small braids at the perimeter. Avoid tight single-strand braiding at the edges, and consider leaving a thin edge-out or using loose feed-in/knotless base techniques to distribute weight rather than concentrating knots at one point.
Next Article
How to Grow Waist-Length Black Hair: Evidence-Based Guide
How to grow and retain waist-length Black hair: realistic timelines, routines, protective styles, and evidence-basedTips