A 'Jedi braid' in real hair terms is most likely a single, sleek braid worn close to the face or behind one ear, inspired by the Padawan braid from Star Wars. It's not a standardized protective style with a formal technique the way box braids or cornrows are, but it can absolutely be installed on natural or relaxed hair as a functional, low-manipulation protective style. The goal of this guide is to help you install it safely, keep it in without wrecking your edges, and actually retain length in the process.
How to Grow a Jedi Braid: Step-by-Step Growth Guide

Simone Okonkwo
22 May 2026
What a Jedi braid actually is (and how it's different from other braids)
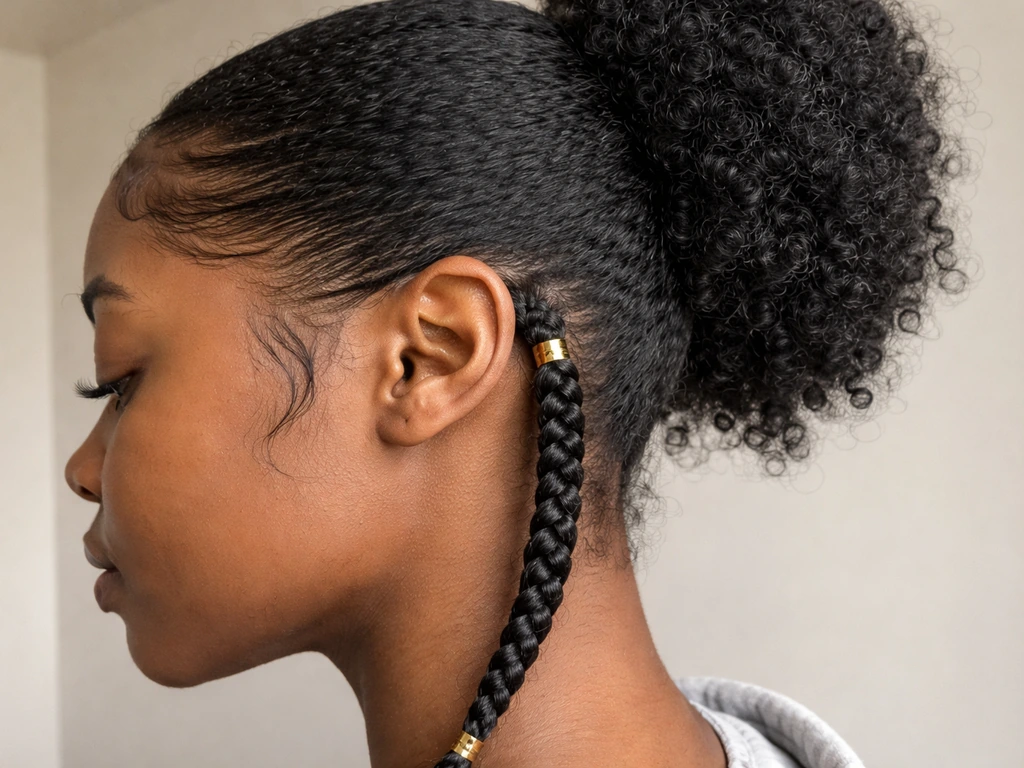
In Star Wars lore, Padawan learners wear a single tight braid, typically worn behind or to the right of the ear, that gets removed when they become a Jedi Knight. That braid is more accurately called a Padawan braid, but 'Jedi braid' has become the popular shorthand most people search for. In the real world, the style translates to a single, defined braid that hangs alongside the face or behind the ear. Most cosplay versions are sold as clip-on accessories, which tells you something: there's no standardized technique the way there is for a three-strand box braid or a cornrow. You're essentially installing a well-executed single braid starting from a parted section of your own hair, sometimes with extension hair added for length.
This makes it meaningfully different from styles like box braids or cornrows. A Jedi braid is a single braid on one section of hair, which means the surrounding hair can be worn loose, in another style, or tucked away. It's closer in spirit to a singular accent braid. Because only one section of hair is involved, the tension risk is more localized, and the maintenance routine is simpler than managing a full head of braids. But that concentration also means if that one braid is too tight, all the stress is focused on one spot.
Prepping your hair before you braid
Good installation starts before a single strand gets twisted. If you skip the prep, you're setting yourself up for breakage, buildup, and an uncomfortable style you'll want to take out in two weeks. Here's what actually matters.
Cleanse and clarify first
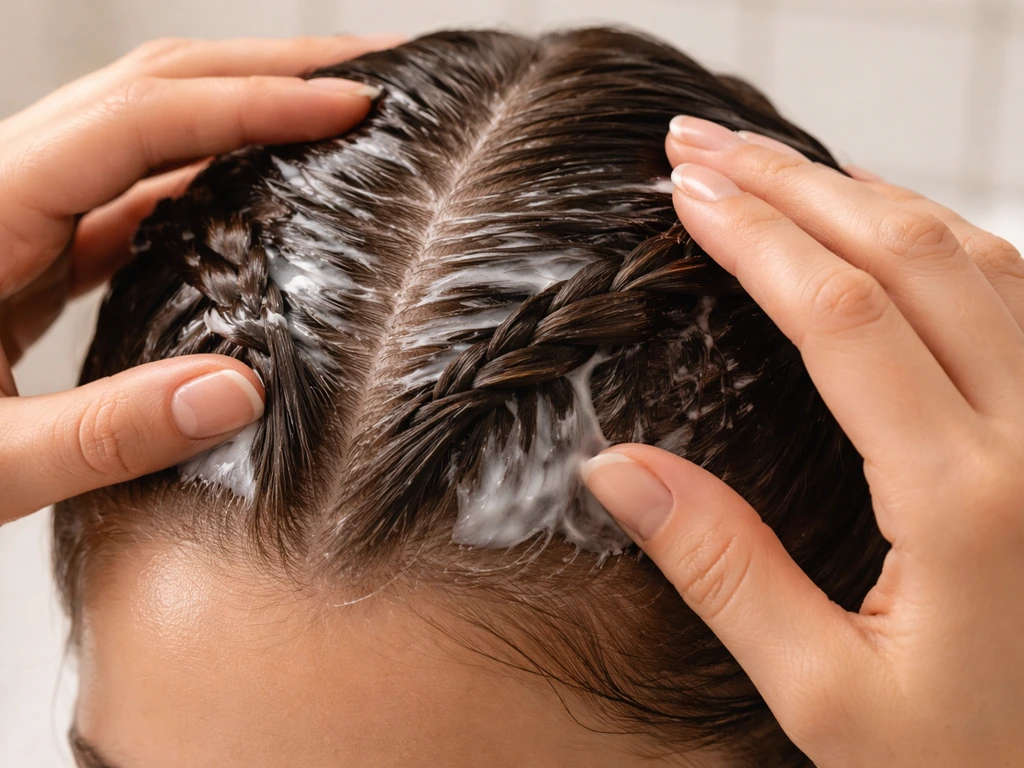
Start with a clean, clarified scalp. Product buildup sitting under a braid for weeks causes itching, flaking, and an unhealthy environment for your follicles. Use a sulfate-free clarifying or moisturizing shampoo before installation, not just a co-wash. If you've been using heavy butter or oil products, you may need a proper clarifying wash to actually remove the buildup rather than just redistributing it.
Deep condition and moisturize
After washing, deep condition. Your hair will be living inside a braid for weeks, and going in dry or brittle means the style is working against you from day one. Focus moisture on the length and ends, since those are the areas most prone to dryness and breakage. Follow up with a lightweight leave-in conditioner. Avoid heavy oils or thick butters at this stage because they can cause the braid to look stringy and they accelerate buildup. A water-based leave-in sealed with a light oil like argan or jojoba is usually the right call.
Detangle completely
Detangle in sections while the hair is still damp and coated in conditioner. Work from ends to roots using a wide-tooth comb or your fingers. Any knots you leave in before braiding will tighten inside the braid as it dries and can cause serious breakage when you take it down. This step is especially important for tightly coiled or type 4 hair, where single-strand knots form quickly and hide easily.
A note on relaxed hair timing
If your hair is relaxed, timing matters a lot. Braiding too soon after a relaxer treatment significantly increases your breakage risk because the hair's protein structure is already compromised from the chemical process. Wait at least two weeks after a relaxer before installing any braid style, and make sure the hair feels strong and elastic, not weak or mushy when wet.
How to install a Jedi braid step by step
The technique itself is straightforward, but the details around tension, parting, and extension use are where most people go wrong.
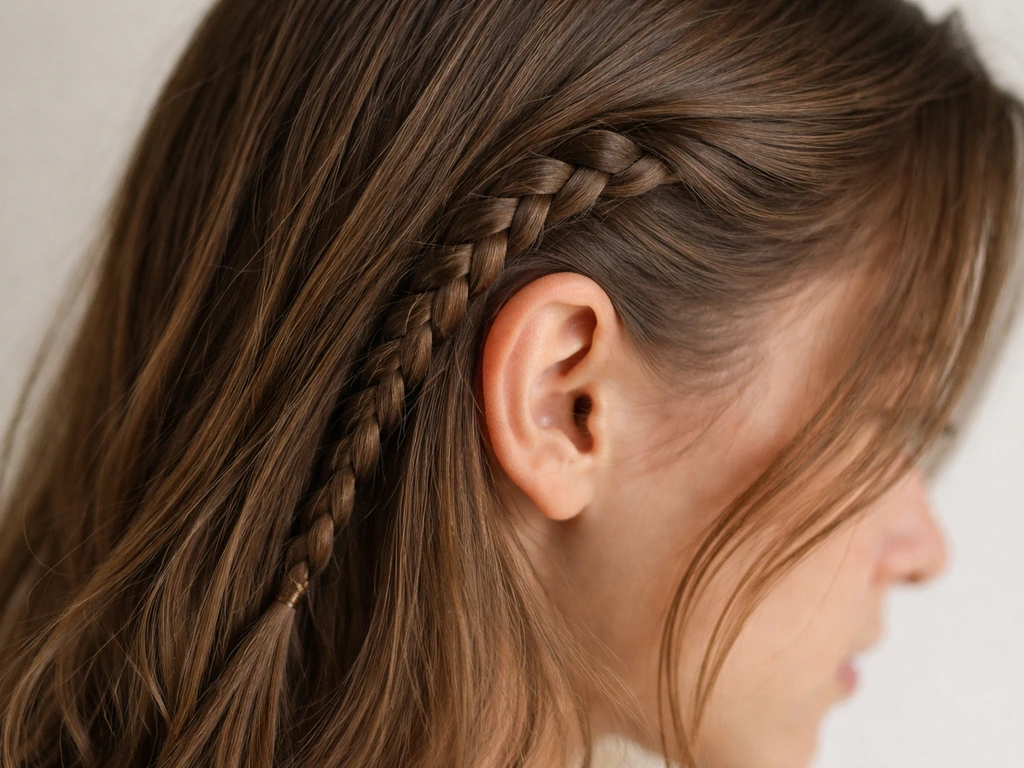
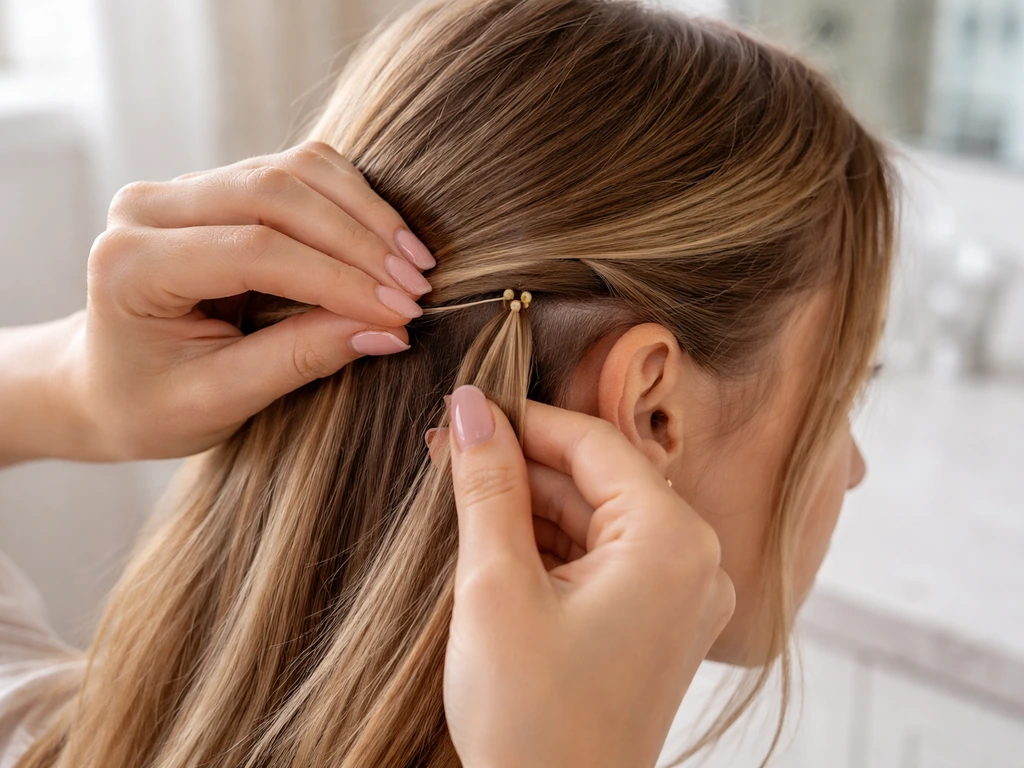
- Part out your section. Decide where you want the braid to sit: typically just in front of or behind one ear, running parallel to the face. Use a rat-tail comb to create a clean, precise part. The section should be about half an inch to one inch wide depending on how thick you want the finished braid.
- Dampen and prep the section. Lightly mist the parted section with water or a water-based leave-in spray so it's workable but not soaking wet. This makes it easier to braid smoothly and reduces friction-related breakage.
- Optional: add extension hair. If you want a longer braid than your natural length allows, fold a small piece of braiding hair in half and loop it around the root of the section before you begin braiding. Kanekalon or a similar synthetic braiding hair works well. Keep the amount of extension hair proportionate to your natural section so you're not overloading the root.
- Begin braiding with medium tension. Start a three-strand braid at the root. The key word here is medium. You want enough tension to keep the braid neat and defined, but the hair at the root should not feel pulled, painful, or tight against your scalp. If you can feel the braid pulling your skin or see small bumps forming at the root, it's too tight.
- Braid all the way to the end. Braid consistently down to the tip of the hair or extension. Secure with a small, snag-free hair band. Avoid rubber bands, which cause breakage at the point of contact.
- Seal the ends. Apply a tiny drop of a light oil or edge control to the ends to smooth and seal them. This reduces frizz and prevents the ends from unraveling prematurely.
- Style the surrounding hair. The rest of your hair can be worn down, in a bun, or in another protective style. The Jedi braid works well alongside a low bun or natural wash-and-go, giving it that defined single-braid accent look.
Supporting real growth and retention while you wear it
Let's be direct about what braids do and don't do for growth. If you're trying to figure out what is the best protective style to grow hair, the safest answer is the one that limits tension and handling while still protecting your ends what braids do and don't do for growth. Your hair grows from the follicle at a rate determined by genetics, nutrition, hormones, and overall health. A braid does not change that rate. What it does do is reduce the daily handling, manipulation, and mechanical stress that causes breakage, which means more of the hair your body is already producing actually stays on your head. If you’re trying to keep more length as you wear braids, you can also use the same gentle, low-tension mindset from box braids to learn how to grow braids for guys without wrecking your edges. That's the retention benefit, and it's real. But only if the style itself isn't creating a new source of damage.
Scalp and edge care
Your edges and hairline are the most vulnerable area. Traction alopecia, which is hair loss caused by repeated tension on the follicles, most commonly shows up along the frontal and temporal hairline. Early signs include small pimple-like bumps along the hairline, tenderness, and redness. If you see or feel any of those signs, take the braid out or loosen it immediately. Traction alopecia is preventable if you catch it early, but it can become permanent if the mechanical stress continues.
Apply a lightweight scalp oil to the braided section and your exposed scalp two to three times a week. Jojoba, peppermint-infused oil, or a light natural oil works well here. Avoid heavy greases that build up and clog follicles. Massage gently with your fingertips to stimulate circulation without adding friction to the braid.
Washing while the braid is in
You should still wash your scalp every two to four weeks while the braid is installed. Well+Good emphasizes that washing braids is necessary for scalp health, and the right frequency depends on factors like your scalp type and lifestyle wash your scalp every two to four weeks. Two weeks is often the sweet spot for the first wash, and four weeks is about the max you want to go between cleanses. Dilute a gentle shampoo in a spray bottle with water and apply it directly to the scalp, working it in with your fingertips rather than scrubbing the braid itself. Rinse thoroughly and follow with a lightweight leave-in or scalp spray. Let the braid air dry completely before covering it or putting it up.
Protecting the braid at night
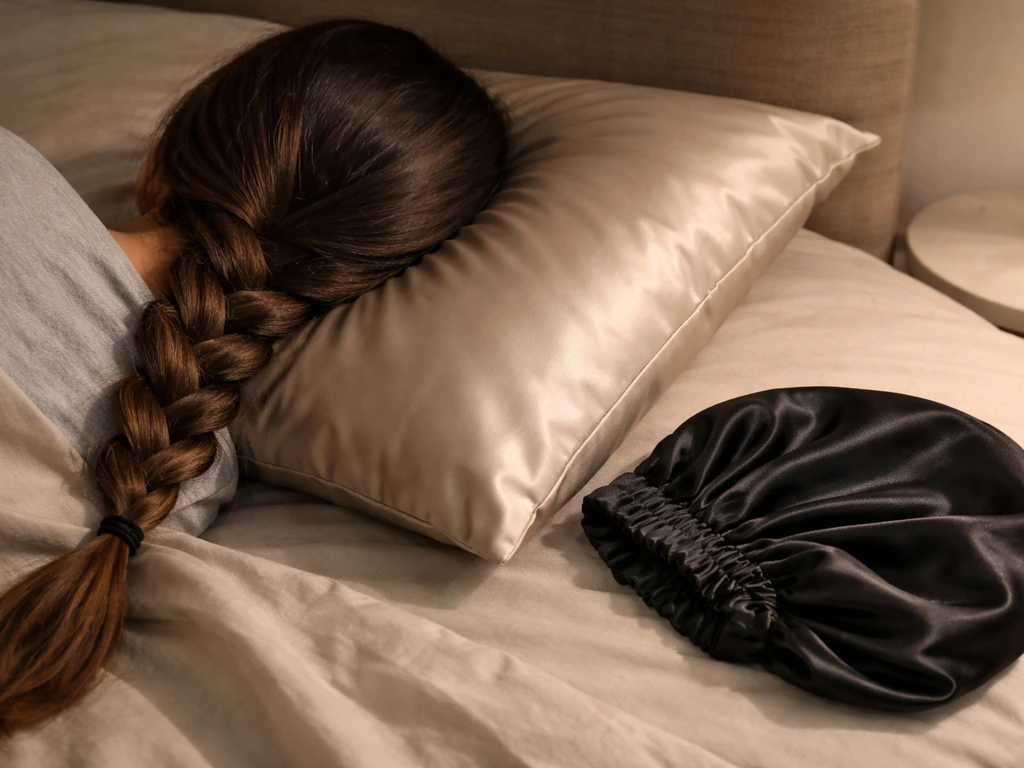
Sleep with a satin bonnet or lay on a satin pillowcase every night. Cotton pillowcases create friction that frizzes the braid, dries out the hair, and weakens the strands over time. This is a simple habit that makes a real difference in how long the style looks good and how much breakage you accumulate.
How long to keep the braid in and how to remove it safely
For a single braid like this, a four to six week wear period is generally the sweet spot. Six weeks is around the recommended maximum for most braid styles before buildup, matting, new growth tangling, and scalp health become real concerns. Eight weeks is pushing it and is only appropriate if your scalp stays completely comfortable, the braid shows no matting, and you've been washing and moisturizing consistently. If you notice itching, significant buildup, visible thinning at the root, or the braid feels like it's fusing with your new growth, take it out. Dermatology Times, quoting AAD guidance, similarly advises wearing tight styles like tight braids only once in a while and stopping them if symptoms appear while consulting a dermatologist if you notice itching, significant buildup, visible thinning at the root, or the braid feels like it's fusing with your new growth, take it out.. Those are not signs to push through.
Removal without breakage
Removal is where a lot of length gets lost unnecessarily. Do not yank, pull, or rush this process. Apply a generous amount of a lightweight detangling oil or conditioner to the braid before you start. Carefully cut or snip the end band, then gently unravel the braid from the bottom up rather than trying to slide it apart from the root down. Once the extension hair (if any) is removed, work through your natural hair in small sections with your fingers first, then a wide-tooth comb, always from ends to roots. Never dry-brush a section that has been in a braid for weeks. Follow removal with a thorough wash, deep conditioning treatment, and a full detangle session.
Troubleshooting common problems
| Problem | Likely Cause | What to Do |
|---|---|---|
| Itching at the scalp | Product buildup or dry scalp | Dilute-shampoo wash, followed by lightweight scalp oil; reduce product heaviness going forward |
| Bumps or pimples along the hairline | Tension-related follicle stress (early traction alopecia) | Loosen or remove the braid immediately; stop any pulling tension; see a dermatologist if symptoms persist |
| Thinning edges or shedding at the root | Chronic tight tension at the hairline | Remove the style, give edges a rest period of at least 4–6 weeks, use a gentle edge serum and keep the area moisturized |
| Breakage when removing | Hair dried and tangled inside the braid, rushed removal | Soak the braid in detangling conditioner before removal; unravel slowly from the bottom up, finger-detangle first |
| Frizz and flyaways mid-wear | Friction from cotton fabrics, dryness, or natural new growth | Satin bonnet at night; light oil or edge-control applied lightly to flyaways; mist hair with water before re-smoothing |
| Product buildup and matting near the root | Leaving the braid in too long or using heavy products | Take the braid down; do not try to re-braid over matted hair; detangle thoroughly before reinstalling |
Best practices specifically for textured and Black hair growth goals
If your primary goal is length retention, a single Jedi-style braid can be a smart, low-manipulation option as part of a broader protective styling rotation. The key is that it needs to work with your hair's needs, not against them.
- Tight coils and type 4 hair have the highest breakage risk from tension because each curl is a potential point of vulnerability. Keep the root of the braid genuinely loose, meaning you can slip a finger under the start of the braid without resistance.
- Natural hair holds moisture differently than relaxed hair. You may need to moisturize the braided section more frequently (every two to three days) using a spray bottle with a water-and-leave-in mix to prevent dryness and brittleness inside the braid.
- Relaxed hair needs a longer rest period between chemical service and braiding. Two weeks minimum, and prioritize protein treatments before installing any braid style to rebuild the hair's structural integrity.
- If your edges have been stressed by previous tight styles, skip the hair right at the front hairline when sectioning for this braid. Start the part slightly further back and give those follicles a genuine break.
- Protective styling works best when you rotate between styles and give your hair several weeks of rest and low-manipulation wear between installs. One continuous cycle of braid after braid with no recovery time adds up to cumulative damage even if each individual install is gentle.
- Consider the thickness of your braid relative to the density of your hair. A very thin, tight braid on fine or low-density hair concentrates stress on fewer strands. Slightly thicker sections distribute tension more safely.
If you're building a longer-term growth strategy, this braid works best as one tool among several. If you want the most from protective styles, focus on gentle installation, moisture, and a realistic wear time so you retain length safely how to grow your hair with protective styles. Styles like cornrows, box braids, and other protective options all play different roles depending on your starting length, texture, and goals. If you specifically want cornrows for length retention, use the same low-tension mindset and edge care habits, and follow a cornrow-focused prep routine. To support longer braid lengths, focus on consistent moisture, gentle detangling, and avoiding tension so your hair can retain the growth you get while wearing braids protective options. The principle that runs through all of them is the same: protective styling retains length by reducing breakage, but only when the installation is gentle, the scalp stays healthy, and the style doesn't overstay its welcome.
FAQ
How do I choose the right size Jedi braid (thin vs thick) for retention?
For length retention, start with a size you can braid without pulling hard at the roots. A thinner braid usually needs less hair per section, which can make tension easier to control, but it can look finer and tangle sooner. If you plan to wear it 4 to 6 weeks, choose a medium size that stays smooth at the base and doesn’t feel like it’s “gripping” your scalp.
Can I keep the rest of my hair loose, or does it need to be tucked away during the braid?
You can keep hair loose, since this style is one accent braid on one section. The key is minimizing rubbing, especially at the hairline and along the braid edges, so secure flyaways away from the braid with a light, non-greasy product. Avoid letting loose hair mat into the braid base, which can create hidden knots when you remove it.
What’s the safest way to add extension hair for a longer Jedi braid?
Use extension hair that matches your natural texture when possible, and attach it gently so the base isn’t overloaded with weight. Before installing, check that the attachment point can bend and move without snagging your scalp. Keep the extension band close to the braid base, not several inches up, because floating attachments increase tangling and make removal harsher.
How can I tell if the braid tension is too high before damage starts?
Early warning signs are scalp tenderness, a “burning” feeling while you’re braiding, numbness, or the root looking unevenly pulled. After installation, if the itch rapidly worsens within the first few days or you notice a smooth shiny pullline along your hairline, loosen or take it out promptly rather than waiting for week two.
How often should I re-moisturize the braid and scalp?
For this single-braid setup, focus on the scalp 2 to 3 times weekly and light moisture on the braid length as needed, usually when it starts to feel dry or looks frizzy. Use a water-based mist or lightweight leave-in rather than heavy creams. If your braid looks stringy quickly, you likely used too much product, rinse and restart with less.
Is it okay to use gel, edge control, or styling cream to lay it down?
Use only a small amount at the surface, especially near the hairline, because thick edge products can build up under the braid and are harder to cleanse. If you use gel or edge control, plan for targeted scalp cleansing at your next wash (diluted shampoo applied to the scalp with fingertips) so buildup does not accumulate at the base.
What should I do if my hair starts to tangle inside the braid?
Stop trying to “fix it” with pulling. Instead, spritz the braid with water or a light leave-in, then gently separate tangles from the outside using fingers. If tangling is progressing quickly at the root, it’s usually a signal to remove earlier than 4 to 6 weeks. Overstaying increases matting and makes detangling much more damaging.
Can I wash the braid, and how do I avoid soaking the whole braid too long?
Yes, wash the scalp every 2 to 4 weeks by applying diluted shampoo directly to the scalp and letting rinse water flow through without scrubbing the braid. After rinsing, squeeze out excess water gently and fully air-dry before covering or putting hair into another style. If your braid stays damp, scalp irritation and odor can develop faster than expected.
What’s the best sleep setup if I’m not using a bonnet?
A satin pillowcase helps, but if your braid is long and touches the pillow, it can still rub at the base. To reduce friction, position the braid away from direct contact with the pillow surface, and secure it loosely so it doesn’t drag when you move at night.
How should I remove it if I used extension hair?
First, detangle with a slip-rich conditioner or detangling oil while the braid is still intact. Then remove the end band or loosen the attachment method carefully, working from bottom up as described. After extension removal, detangle the natural hair in sections with fingers first, then a wide-tooth comb, never combing dry because single braid knots can tighten overnight.
How long should I wait after a relaxer before installing a Jedi braid, if I want minimal breakage?
A common safe window is at least two weeks, but use feel and strength as your main guide. When wet, the hair should stretch with elasticity instead of feeling mushy or overly soft. If it snaps easily during finger-detangling, delay braiding and add a conditioning or protein-balanced routine to restore strength before reinstalling.
Next Article
How to Grow a Padawan Braid With Low Tension
Step-by-step padawan braid guide for low tension: protect roots, retain length, moisturize, maintain, and prevent breaka